 New Case
See Also
To create a new case in GoServicePro, follow these steps:
Step 1: Access the “New Case” Form
- In your workspace, locate the New drop-down menu.

- Select New Case from the list.
- The New Case form will launch, and you will see search options on the left-hand side.
Step 2: Search for a Contact, Site, Asset, or Entitlement
You have four search options to find the necessary details:
- Contact
- Site
- Asset
- Entitlement and Contract
These searches are interconnected. For example, selecting a site will filter the contacts and assets for that specific site. Similarly, choosing an asset will narrow down the available sites and contacts.
Step 2.1: Perform a Search
- Start typing in the search field. After entering four characters, the system will automatically perform a search or you can press enter.
- You can type multiple words separated by spaces to search across different fields at once.
Example: Searching for a Contact
- Let’s search for Sample Contact.
- If the contact does not exist in the system, you can create a new one by clicking the Create New Contact button.

- This button allows you to add a new contact directly to the system and associate it with the current case.
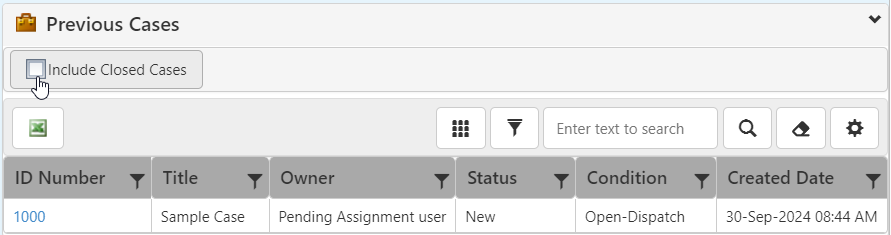
- Once the contact is selected, the contact and site searches will automatically populate and the previous open cases for this site will appear.
- To view closed cases, click the Include Closed Cases button.
- If the contact does not exist in the system, you can create a new one by clicking the Create New Contact button.
Step 2.3: Search for an Asset
- To find an asset related to the site, you can either:
- Type the search criteria in the Site Asset search field.
- Or click the Site Assets Pop-up Button to view assets in a hierarchical view.

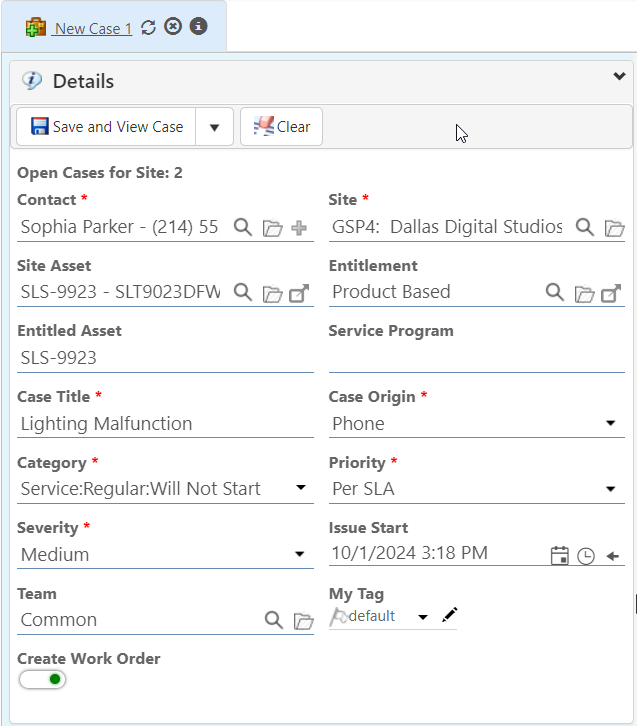
Step 2.4: Select a Contract or Entitlement
- After selecting an asset, you can view and choose the contracts or entitlements applicable to this customer.
- The chosen entitlement will define:
- Valid service offerings for this case.
- Service Level Agreements (SLAs).
- Labor and and material pricing.
Step 3: Provide a Case Title
- Add a Case Title that describes the issue. This title appears in several locations across the application. Make it descriptive so other users can tell the nature of the case at a glance.
- Example: Lighting malfunction.
Step 4: Select a Case Origin
- Choose how the case was created using the Case Origin drop-down. Typical options include Phone, Email, Web, etc.
Step 5: Select a Case Category
- Categories in GoServicePro are five-level hierarchical lists that help identify and classify the case. The category selection impacts:
- Reporting
- Case categorization
- The types of predefined Work Order Templates that apply.
- Example category selection:
- Category 1: Service
- Category 2: Regular
- Category 3: Will Not Start
Step 6: Define Priority and Severity
- Priority: Set the internal priority level for the case.
- Severity: Define the severity from the customer’s perspective.
- Both fields are essential for prioritizing case resolution.
Step 7: Set the Issue Start Date
- By default, the Issue Start Date is the time when the new case is created. However, if the problem started earlier, you can backdate this field to align with the actual start time and ensure that SLAs are applied correctly.
Step 8: Assign the Case to a Team
- By default, the case will be associated with the Common Team, but you can select a different team if needed.
Step 9: Optionally Create Work Orders
- You can opt to create work orders during the case creation process. If this option is checked, work orders will automatically be generated for the case.
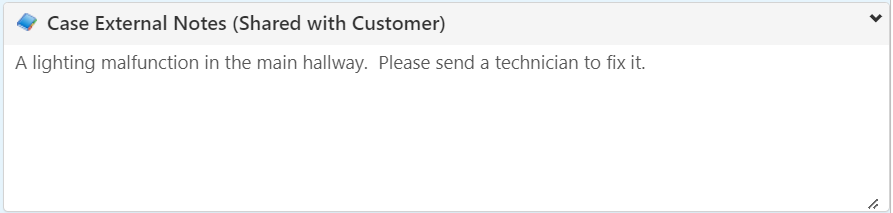
Step 10: Enter Initial Notes
- In the Notes section, describe the issue as reported by the customer. These initial notes will be visible throughout the system and displayed prominently for all types of users.
Step 11: Save and View Case
- After filling out the necessary fields, click Save and View Case.
- If you have selected the option to create work orders, they will be generated alongside the case.
- You may also choose Save and New if you want to continue entering additional new cases.
Note: Statuses, dropdown lists, and teams are all configurable, allowing your organization to tailor these options to suit specific workflows and preferences.
Required fields are indicated by a *.