 Ship
Ship
Shipping represents the physical boxing and shipping of the parts on a part request. It tells us that the part is on its way to the tech or location. Orders can be broken down into multiple shipments with different carriers and waybills. The movement of the part to the destination location/tech is logged by the warehouse worker once they hand the part off. Shipping slips are able to printed off directly from inside of GoServicePro.
You can perform ![]() Receive,
Receive, ![]() Part Returns or
Part Returns or ![]() Receive to Truck transactions on a shipped part.
Receive to Truck transactions on a shipped part.
Steps:
1). From the Line Items grid, select the line item that you want to ship.
2). On the toolbar, and from the ![]() Transactions menu,
Transactions menu,  click
click ![]() Ship
Ship
3). In the Ship 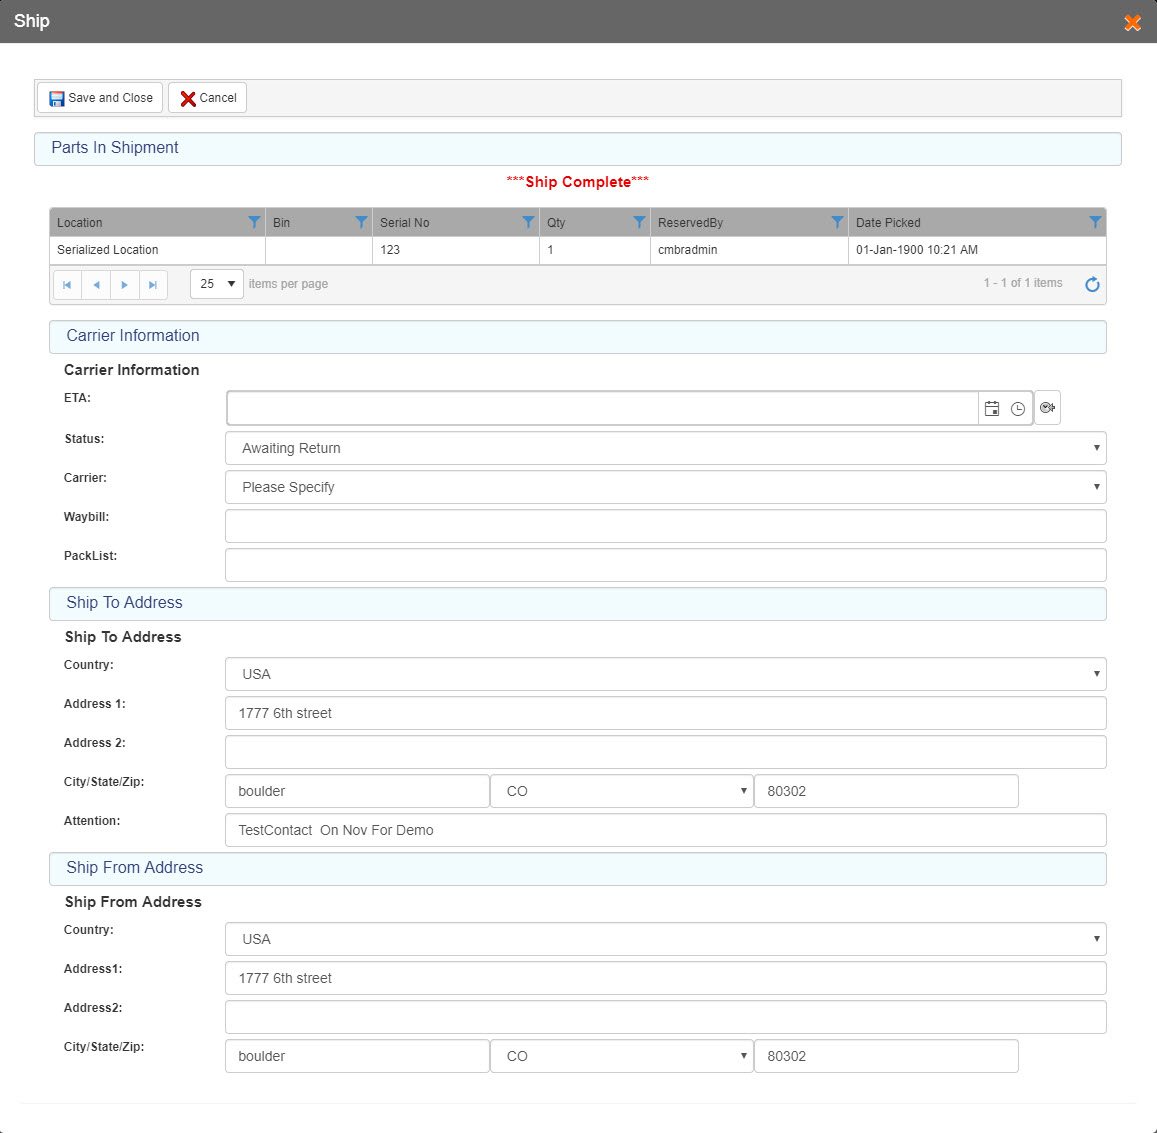 form, and from the Parts In Shipment section, select the part(s) that you want to ship.
4). In the Carrier Information section:
a). In the ETA field, enter the date & time for Expected Time of Arrival of the part.
b). From the Status dropdown list, select the desired status for ![]() Ship transaction.
Ship transaction.
c). From the Carrier dropdown list, select the desired type of shipment.
d). From the Waybill field, enter the Waybill number so that you can accompany goods on their movement from consignor to consignee.
e). From the PackList field, enter the PackList number so that the consignee can refer it for accurate tallying of the delivered goods.
5). The Ship To Address and Ship From Address sections display data automatically based on Part Order Destination Site and Part Order Site respectively. This data is read-only.
6). On the toolbar, click:
i). ![]() Save and Close to save the ship details and close the Ship window.
Save and Close to save the ship details and close the Ship window.
ii). ![]() Cancel if you do not want to save the ship details you have just entered.
Cancel if you do not want to save the ship details you have just entered.